
PLC guide
Connect the AR4 to a PLC with Modbus
The AR4 joins a PLC cell over serial Modbus, not Ethernet. The add-on is an RS-485 board in the base, brought out on an RJ45 jack, running Modbus RTU.
Modbus RTU over RS-485
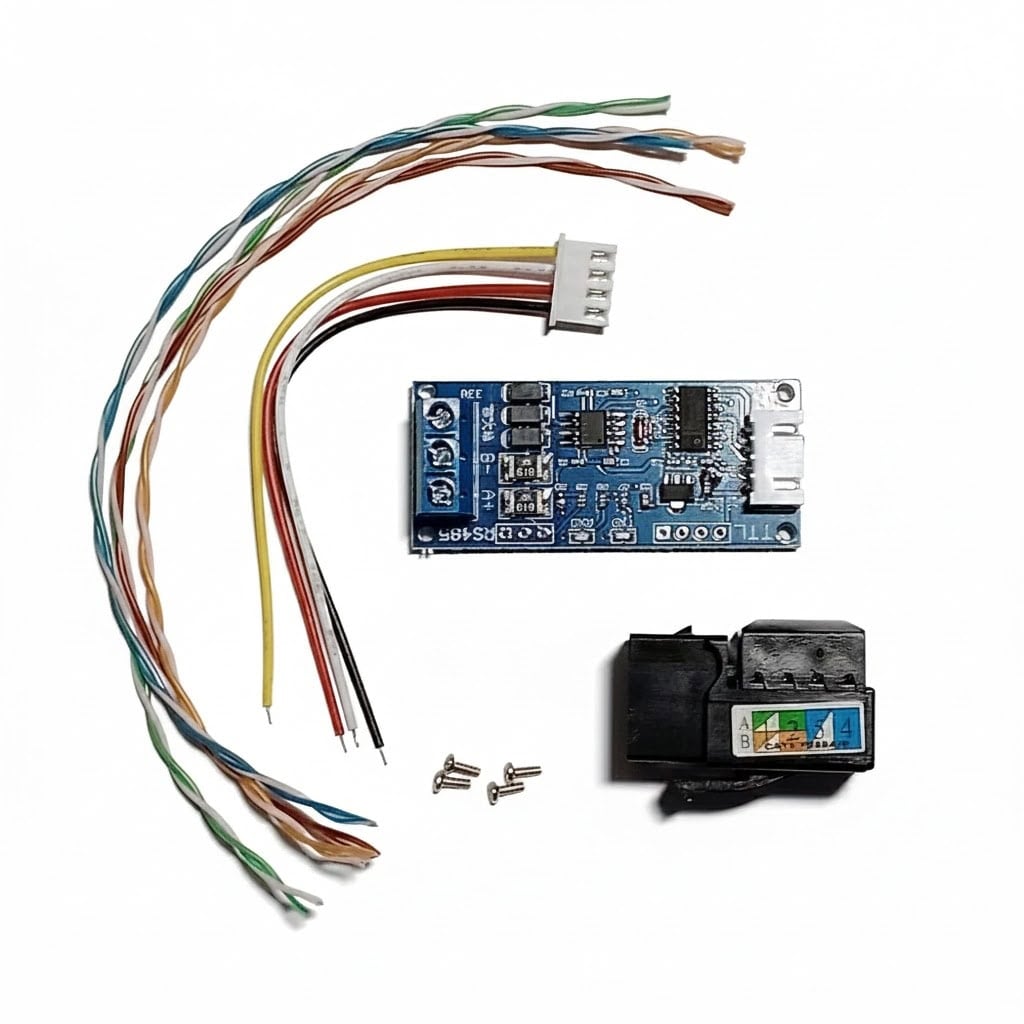
The $16 AR4 Modbus PLC upgrade is the RS-485 TTL board, wires, screws and RJ45 keystone jack. It fits the AR4-MK5 6 axis robot arm kit. Chris's note on the update is the RS485 Modbus news post.
Physical layer
RS-485 2 wire
Baud
38400
Connector
RJ45 jack
Kit
$16
The RS-485 upgrade kit
The product page describes one job: add Modbus PLC communication. The board is an RS-485 TTL adapter. You mount it in the base and land A+, B− and ground on the RJ45 keystone jack so the arm sits on the same serial bus as the PLC.
| Includes | RS-485 TTL board, wires, screws, RJ45 keystone jack |
|---|---|
| Protocol | Modbus RTU over RS-485 (2 wire) |
| Settings in the manual | 38400 baud. Station number is configurable. |
| Example in the manual | Direct Logic PLC, Chapter 3 |
| Firmware library | ModbusMaster, installed in the Arduino IDE with the Teensy sketch |
Wire it the way the manual shows
- Step 1Fit the boardInstall the RS-485 TTL board in the base with the screws in the kit, and the RJ45 jack where the manual shows the keystone.
- Step 2Land three wiresA+, B− and ground. The manual uses 2-wire RS-485, not a 4-wire full-duplex pair.
- Step 3Set the stationGive the arm a device number that does not collide with the PLC or other nodes. The manual says the station can be any number you need.
- Step 4Match the PLC port38400 baud on an RS-485 port. Chapter 3 walks through a Direct Logic example. Other PLCs use the same serial settings if they speak Modbus RTU.
That video is the one embedded on the news post titled "I've added PLC control for the AR4 via RS485 Modbus."
Call it from the Python API
The Python API guide sends Modbus as JSON to the Teensy. Reads come back as text, not parsed integers. Common firmware replies are "Done", "Timeout" and "Modbus Error". Addresses and the slave id are whatever your PLC program uses. The defaults in the guide are slave 1 and address 0:
ARRobot Modbus helpers
coil = robot.modbus_read_coil(slave_id=1, address=0, count=1)
result = robot.modbus_write_register(slave_id=1, address=0, value=0)
ready = robot.wait_modbus_coil(slave_id=1, address=0, expected=1, timeout=10)- modbus_read_coil, modbus_read_discrete_input, modbus_read_holding_register, modbus_read_input_register
- modbus_write_coil, modbus_write_register
- wait_modbus_coil, wait_modbus_input, wait_modbus_holding_register
Modbus RTU over RS-485
Use the product and the manual's description: RS-485, 2 wire, 38400 baud. That serial link is Modbus RTU. The Python API sends those calls to the Teensy. The kit, the manual and the API guide do not add an Ethernet Modbus service.
The same RS-485 link is what the mechatronics lab guide and the CNC tending guide use for a cell. The education skills list names it RS-485 Modbus.
The arm
AR4-MK5 6 axis robot arm kit
Add the $16 Modbus board to the combo kit when the cell has a PLC. Kits and the upgrade are listed on robot kits.
Keep reading
FAQ
Is the AR4 PLC link Modbus/TCP?
No. The product is a Modbus RTU over RS-485 upgrade: an RS-485 TTL board and an RJ45 keystone jack. The build manual uses RS-485 2 wire at 38400 baud. The Python API and the manual do not describe a built-in Modbus/TCP port.
What is in the upgrade kit?
The $16 kit includes the RS-485 TTL board, wires, screws and an RJ45 keystone jack. It mounts in the base so the arm can share a serial Modbus network with a PLC.
What baud rate and wiring does the manual use?
RS-485 2 wire at 38400 baud, with A+, B− and ground. The station number is configurable. Chapter 3 shows a Direct Logic PLC example.
How do I read and write Modbus from Python?
ARRobot methods on the Teensy: modbus_read_coil, modbus_read_discrete_input, modbus_read_holding_register, modbus_read_input_register, modbus_write_coil, modbus_write_register, and wait helpers for a coil, a discrete input or a holding register.